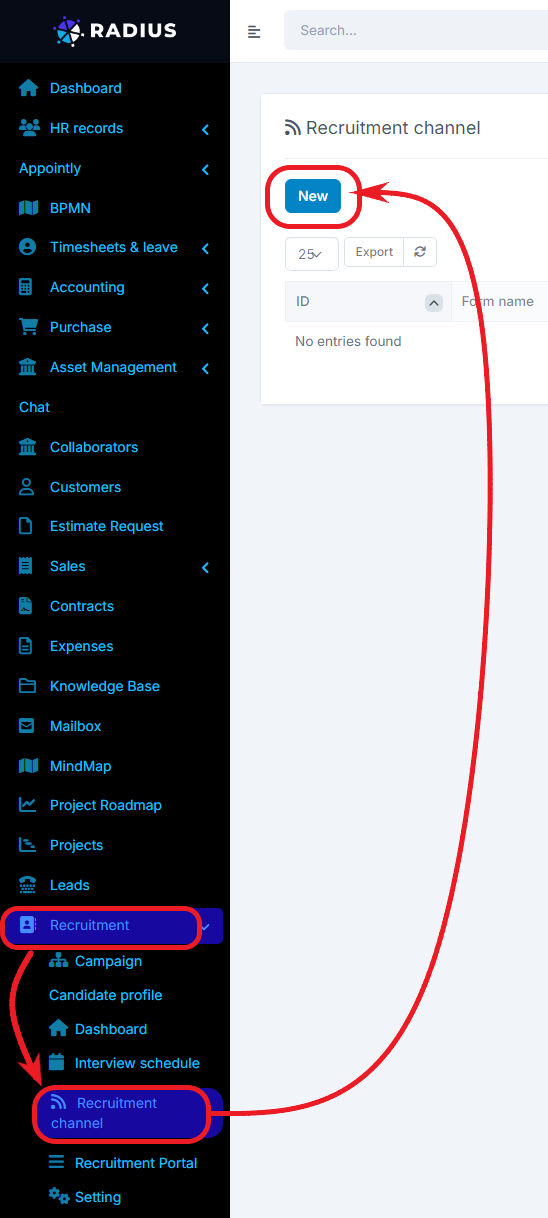
To create a recruitment web form, go to Recruitment -> Recruitment Channel -> click on the New button.

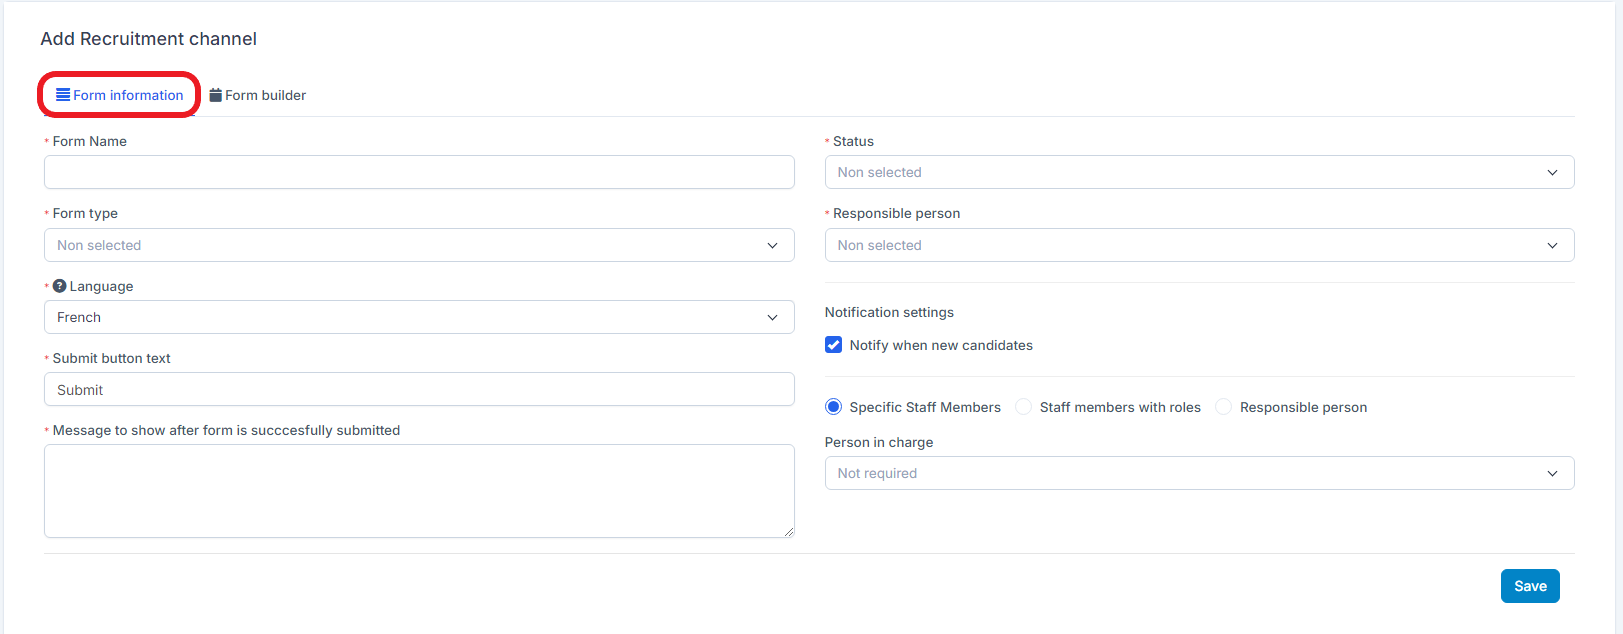
- Form information. In this part, you set up the information related to the form in question.
* Form name: Name of the form.
* Status: Select the status from the drop-down list.
* Form type
* Responsible: select the name of the person responsible from the drop-down list.
* Language: the language used in the form. select the language from the drop-down list
* Notification settings: If you check the box, it means that you want to be notified when there is a new candidate.
By choosing:
(+) Specific staff members: you will be invited to select the person's name from the drop-down list in the Person in Charge field.
(+) Staff members with roles: you will be invited to select the role's name from the drop-down list in Roles to notify.
(+) Responsible Person: the notification goes straight to the person responsible for the recruitment.
*Submit button text: Name of the submit button. you can personalize it according to your needs.
* Message to show after the form is succesfully submitted: It's a message that will appear after submission. Eq. Thank you for your submission.
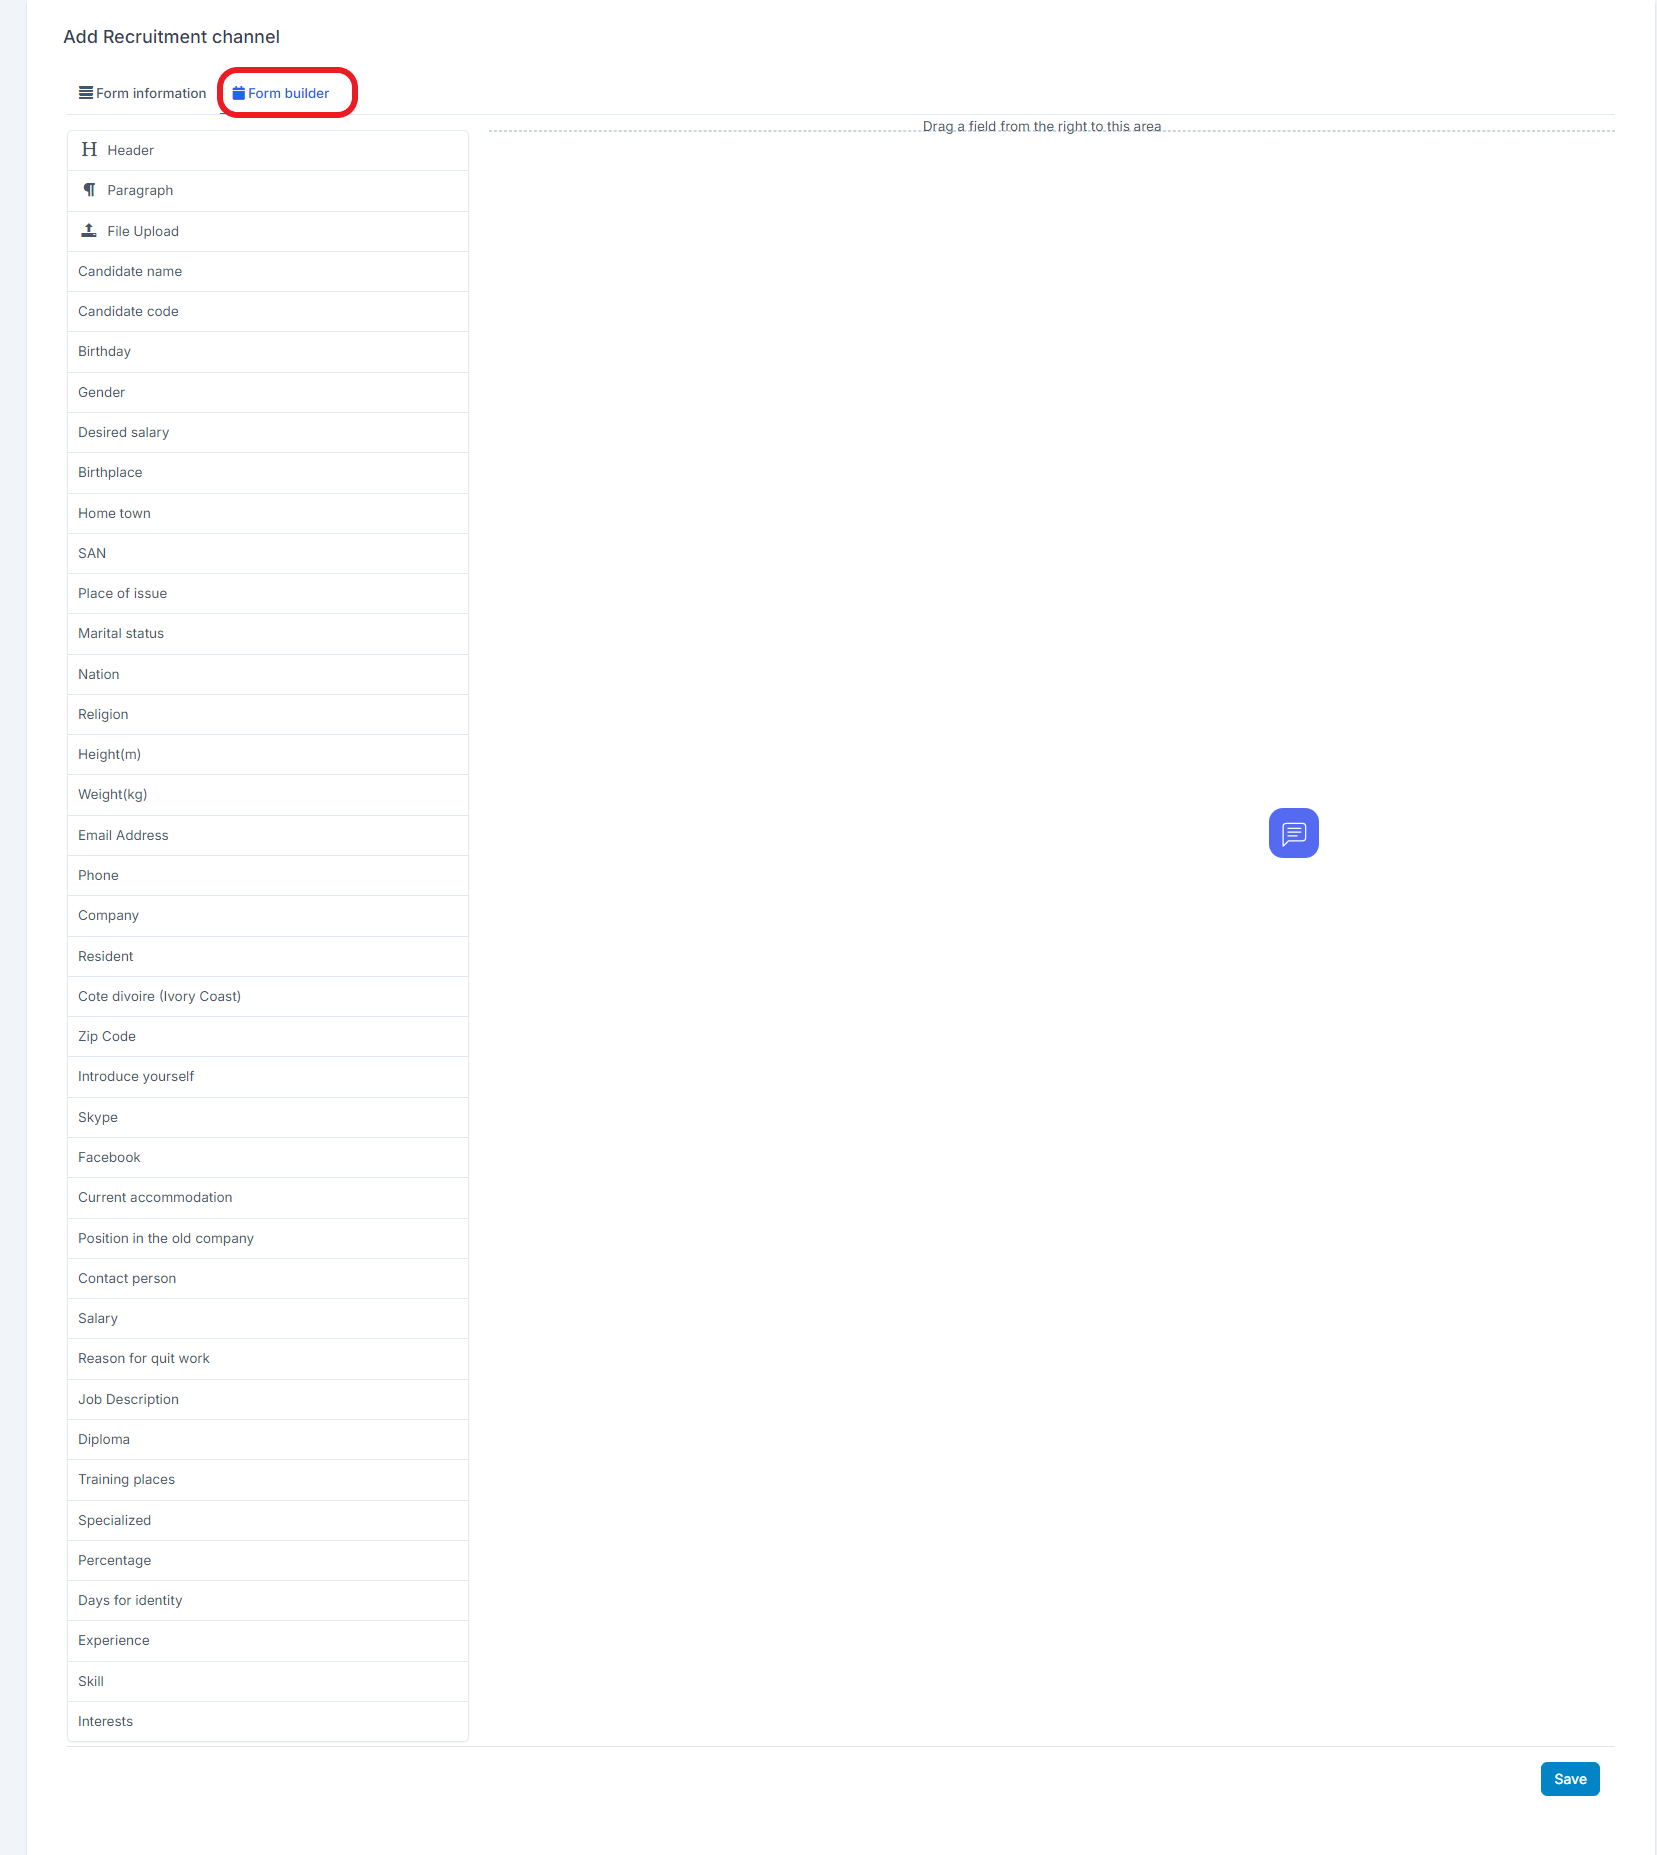
- Form builder: In this part, you configure the shape and layout of the form. For example, if you want to put a title on your form, then click on Header, and the field is found in the table on the right. To change the name, click on the pen icon and a pop-up window opens. Enter the text in the text box and click close to close the pop-up window after editing. You can repeat the same gesture for the other fields. At the end, click on the Save button which is at the bottom right of the table, when you have finished configuring the form.

