To create a new project, go to Projects menu and click New Project.

The form below will appear.
There are several fields to fill in to better inform the project.
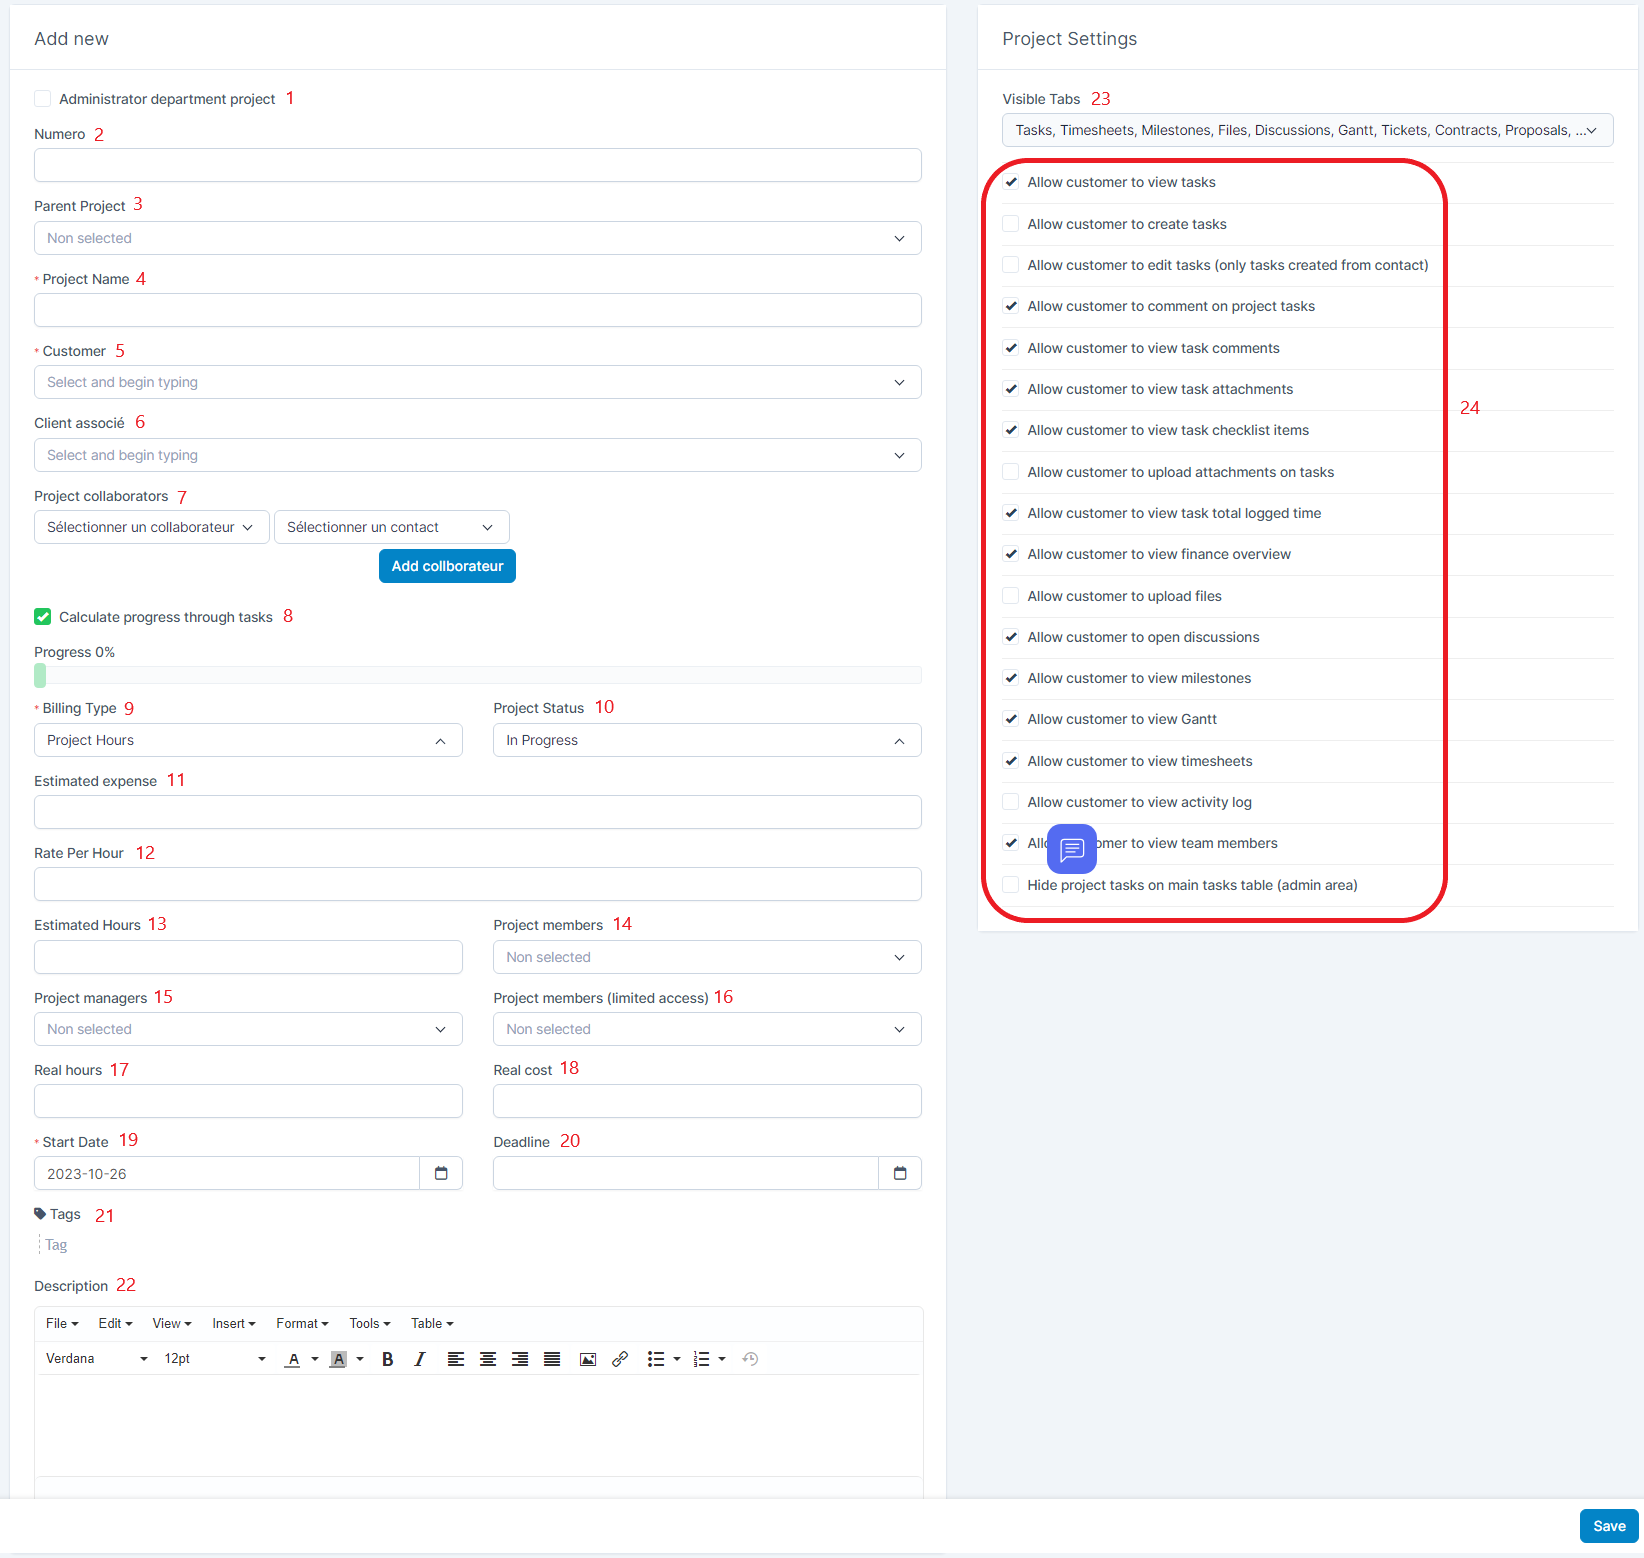
1- Administrator department project: Check the box if the project belongs to the administrator department.
2- Number: Write down the number of the project.
3- Parent Project: Select a parent project if the new project is linked to other existing.
4- Project Name: The name of the project – Visible to customer.
5- Customer: Select customer
6- Associated customer: Select the associated customer if the project is linked to other customer.
7- Project collaborators: In this field you can select the collaborator for the project. You can also select a contact or add a collaborator.
8- Calculate progress through tasks: It is a representative graphic for the progress of the project.
9- Billing Type: there is 3 billing types for the projects. (auto selected from the most used billing type)
Billing type cant be changed if any billed tasks found for the project.
Fixed Cost
10- Project Status: this field allows to choose the status of the project.
11- Estimated expense: Write here your approximate expense for the project.
12- Rate Per Hour: your salary per hour. It is based on tasks total billable hours – Total is calculate per task Hourly Rate (When creating task you need to set hourly rate for this tasks if is billable)
13- Estimated Hours: The estimate your for the project.
14- Project members: Select the member of the project.
15- Project managers: select the project manager.
16- Project members (limited access): Only projects members and staff who has permission Manage Projects will be able to access the project.
17- Real hours: Write the real hour of the project.
18- Real cost: Write the real cost of the project. It is based on project total billable hours.
19- Start Date: Select the starting date
20- Deadline: Write the date when the project ends.
21- Tags: Write tags to help you find the project by using the search tab.
22- Description: This field allows you to describe the project.
23- Visible Tabs: Each project can have own settings based on the customer.
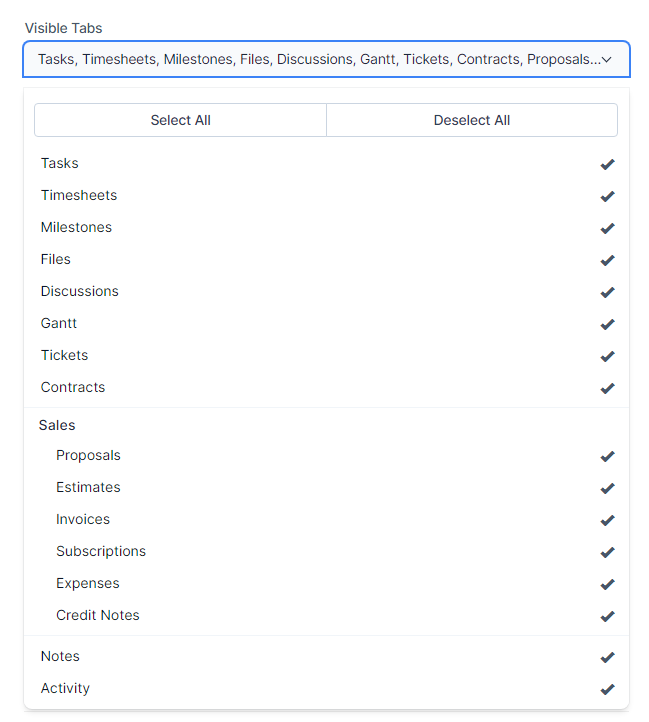
24- Checkbox row:
- Allow customer to view tasks
- Allow customer to comment on project tasks – Not applied if Allow customer to view tasks is unchecked.
- Allow customer to view task comments- Not applied if Allow customer to view tasks is unchecked.
- Allow customer to view task attachments- Not applied if Allow customer to view tasks is unchecked.
- Allow customer to view task checklist items- Not applied if Allow customer to view tasks is unchecked.
- Allow customer to upload attachments on tasks- Not applied if Allow customer to view tasks is unchecked.
- Allow customer to view task total logged time
- Allow customer to view finance overview – (Finance overview for tasks is not shown if project Billing Type is Fixed Cost)
- Allow customer to upload files
- Allow customer to open discussions
- Allow customer to view milestones
- Allow customer to view Gantt
- Allow customer to view timesheets
- Allow customer to view activity log
- Allow customer to view team members
Notes:
When creating new project initialy the default project settings will be taken from the last project. You can adjust if any changes are required.
Project currency will be your base currency or the customer currency. If the customer have setup currency different then the base currency the currency will be used from the customer profile.
If your staff members are able to see all projects make sure that the member dont have permissions for projects VIEW. VIEW allows staff member to see ALL projects. If you only want them to see projects they are assigned (added as members), do not give VIEW permissions.