Basic Business Flow Overview for Running Automated Campaigns from Segment
Create Category -> Create Email template / SMS template -> Create Segment -> Create Email / SMS -> Create Campaign -> Workflow design -> RUN CRON JOB
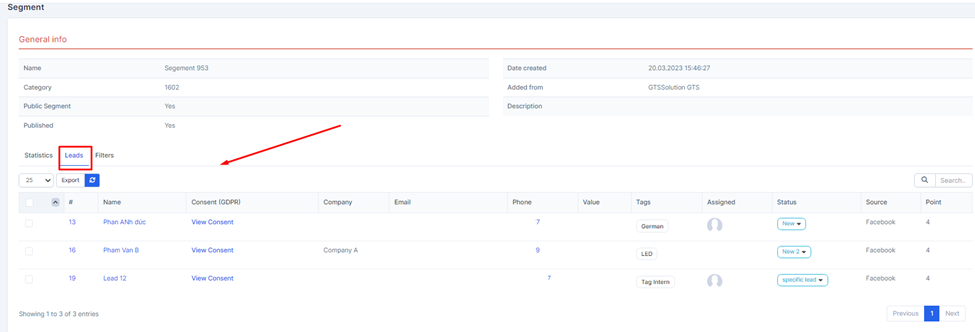
Create Segment to use for Campaign
Segment is used to filter the list of Leads from the Lead Menu, then get this list to use for running Campaign
The Lead menu will contain all the Leads you have, but the Leads in the Segment are used to filter and contain the list of Leads that need to run a certain campaign
- Step 1: Select create Segment -> Enter the necessary values -> Switch to the Filters tab -> enter filter conditions to get the Lead list

-> Result:
Design email to use for Campaign
Email template is used to design common templates for Email. You can create Email template first, then use for Email. Or you can just design Email
- Step 1: Select the Email screen -> Create email -> Enter the necessary information
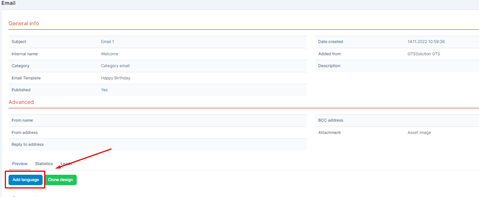
- Step 2: The system will move to the View screen. Here you select the function Add language -> Select language -> Save
Choosing the language to design Email in different languages. Then, based on the Lead's language, send an email in the corresponding language
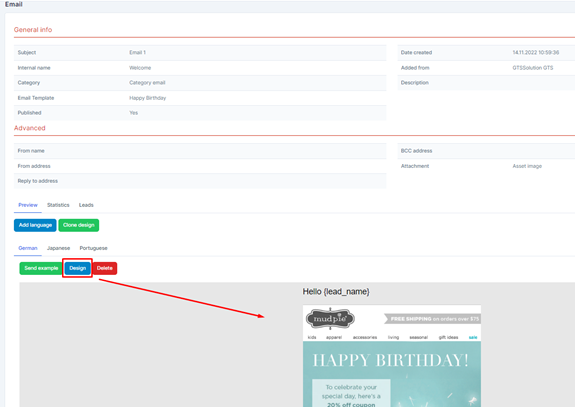
- Step 3: Select the Design function -> Then proceed to design Email
Create Campaign to send email
- Step 1: Select the Campaigns screen -> Select the Add function included in the screen

- Step 2: The system will display the Campaign screen -> Proceed to enter the necessary values -> Then click Save to save the action just done and move to Step 3

Explanation:
o The Name field is used to enter the name of the corresponding Campaign
o The Category field is used to select the Campaign type. This field data is taken from the Category screen in Setting - set in section 1.2 and only get Categories of type Campaign
o The Color field is used to select a recall color for later sorting and searching
o Published field: If Yes is selected, the successfully created Campaign will take effect. Otherwise, if you choose No, the generated Campaign will have no effect
o The Start date and End date fields are used to select the start and end date of the Campaign
o The Description field is used to enter a description for the Campaign
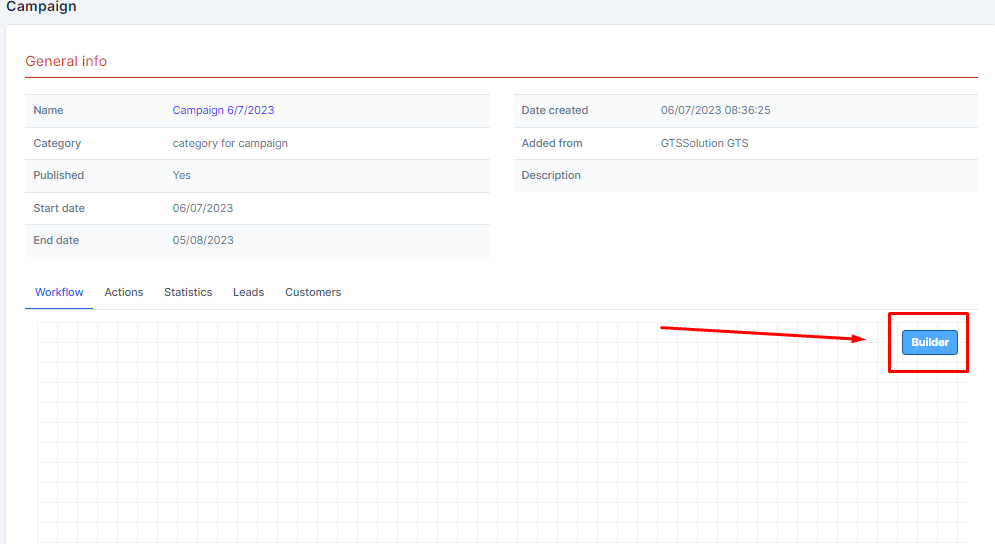
- Step 3: After entering the necessary data and selecting Save, the system will display a screen General Details -> Draw Workflow for the corresponding Campaign through the Builder function
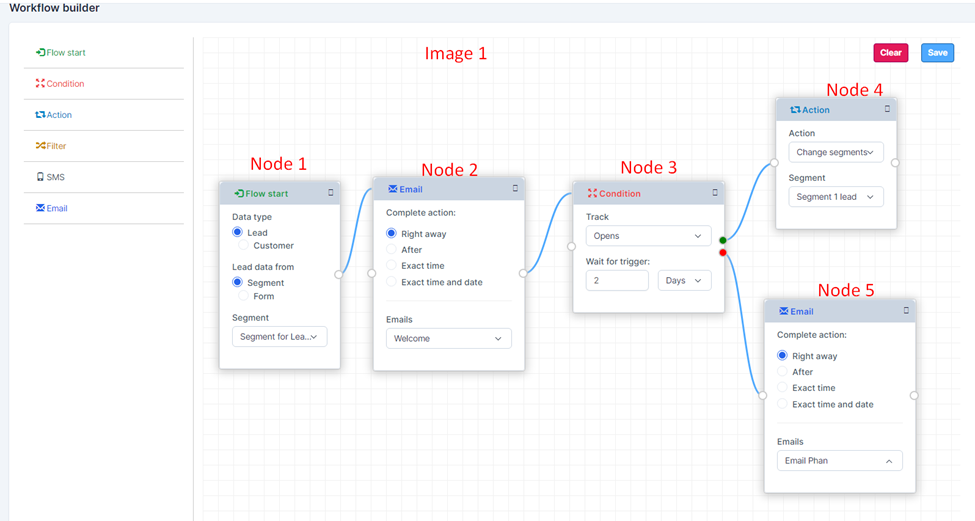
- Step 4: The system will display the Workflow builder screen -> Proceed to draw the Flow -> Then select Save to save the action just done or select Clear to delete the Workflow
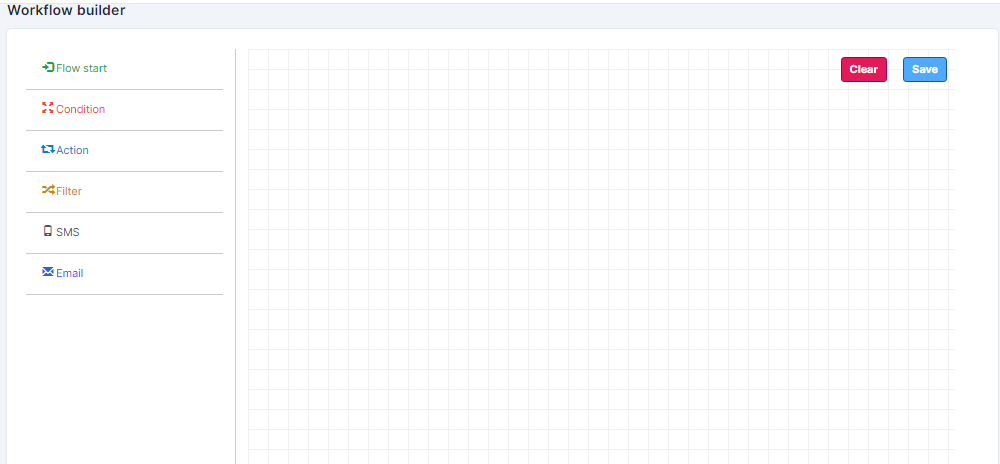
*Note:
Drag the action fields to the design area then release the mouse
Select Ctrl and scroll function to zoom in or zoom out
- Step 5: RUN CRON JOB
Here is an example of a design example:
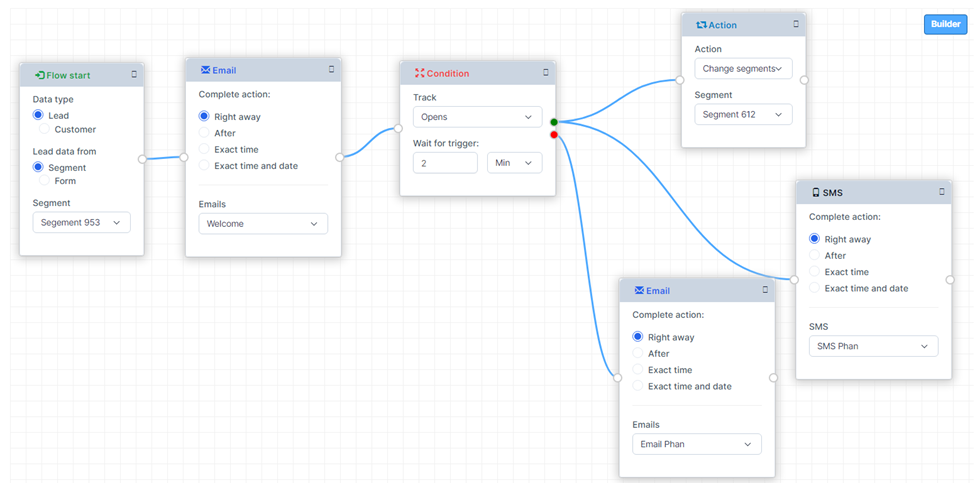
I would like to describe according to this Workflow for easy visualization:
Start: The system will take the filtered list in Segment to run Campaign. The list will be displayed in the Lead tab of the Campaign to know who the system will send emails to
When the Cron job is run, the system will start sending the "Welcome" Email to the Leads in Segment 953. After that, the system will wait 2 minutes. After 2 minutes, if the Leads open the email, the system will transfer the Leads to another Segment and send SMS to the leads who have opened the email. For Leads who do not open email, the system will send another email
*Notes for Campaign :
- The start date to run the Campaign must be less than or equal to the current date. If you choose a larger date, when the Cron job runs, the system will ignore this campaign because the valid time has not been reached
- The end date must be greater than the current date for the campaign to be valid
- The system will only rerun the "Nodes" that are not running in the campaign. The nodes that were already running will not run again. If the Campaign has been run with all the "Nodes", it cannot be run again but must create a new Campaign
