Useful campaigns for contact management, marketing and sales support
Campaign is a marketing activity that tailors the Components and Channels through which you can publish your content in a coordinated, strategically timed way to meet specific business goals.
After you add your Contacts and set up the required Channels, you can create Campaigns to build meaningful relationships with your Contacts.
One of the key benefits of the Campaign workflow is the ability to define these workflows in advance and have them automatically respond to your Contact and progress.
This automation reduces the amount of time required for manual Contacts operation and improves the reliability of Contact nurturing.
The campaign, if it has finished running the internal nodes for the Leads, will not run again.
But if the list of Leads is updated, the Campaign will run Nodes to those new Leads
Note: In order for the Campaign to send emails, you must set up Cron Job and Run Cron Job
1. Create Campaign
- Step 1: Select the Campaigns screen -> Select the Add function included in the screen

- Step 2: The system will display the Campaign screen -> Proceed to enter the necessary values -> Then click Save to save the action just done and move to Step 3

* Explanation:
o The Name field is used to enter the name of the corresponding Campaign
o The Category field is used to select the Campaign type. This field data is taken from the Category screen in Setting - set in section 1.2 and only get Categories of type Campaign
o The Color field is used to select a recall color for later sorting and searching
o Published field: If Yes is selected, the successfully created Campaign will take effect. Otherwise, if you choose No, the generated Campaign will have no effect
o The Start date and End date fields are used to select the start and end date of the Campaign
o The Description field is used to enter a description for the Campaign
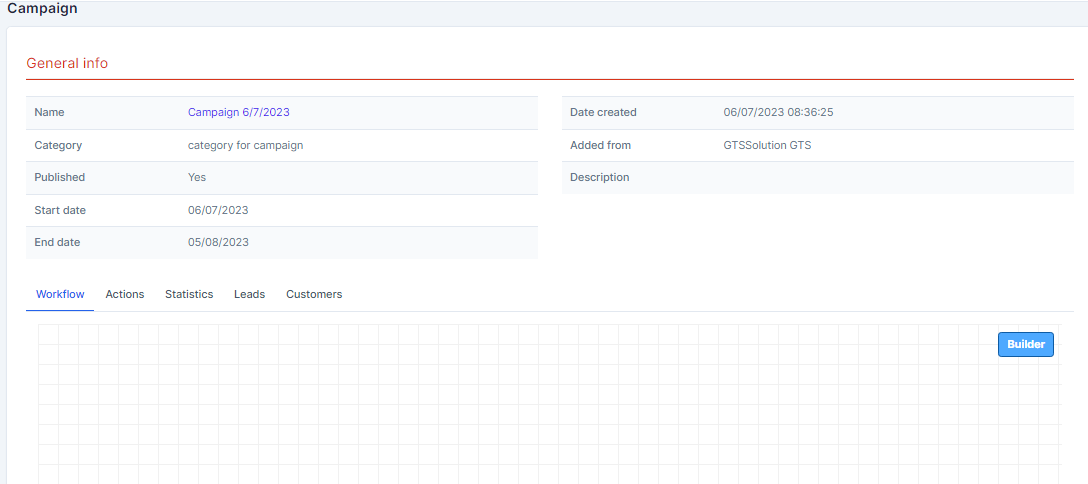
- Step 3: After entering the necessary data and selecting Save, the system will display a screen General Details -> Draw Workflow for the corresponding Campaign through the Builder function

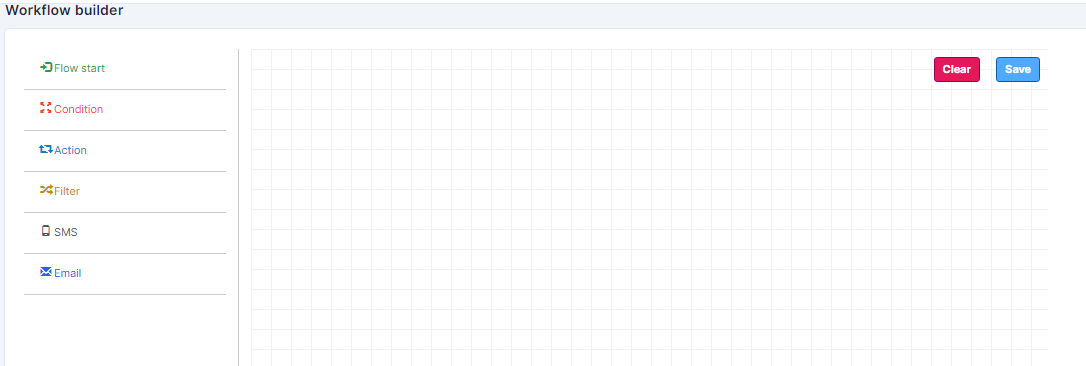
- Step 4: The system will display the Workflow builder screen -> Proceed to draw the Flow -> Then select Save to save the action just done or select Clear to delete the Workflow

*Note:
Drag the action fields to the design area then release the mouse
Select Ctrl and scroll function to zoom in or zoom out
2- View Campaign
- Step 1: At the Campaigns screen -> Select the View function corresponding to the Campaign to see information

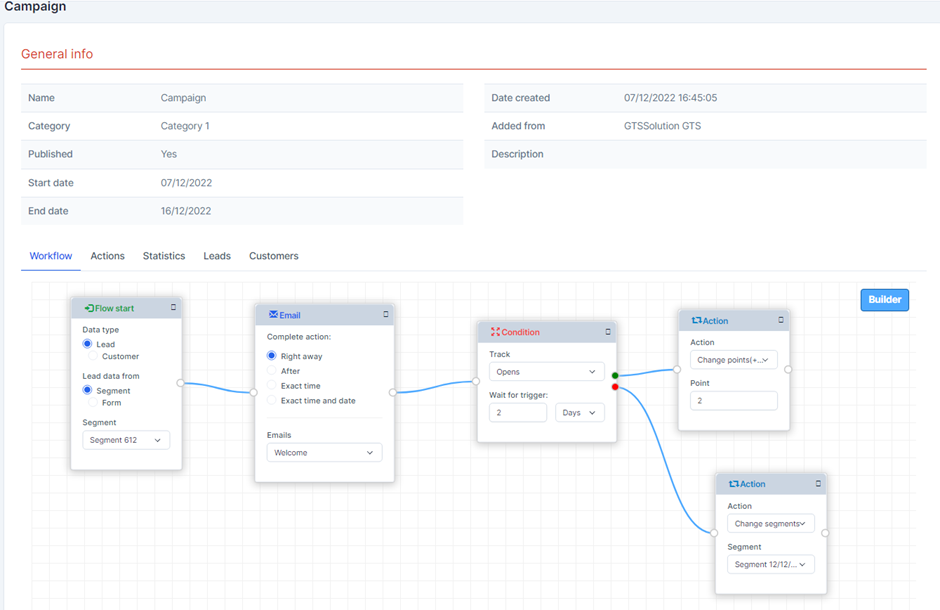
- Step 2: The system will display a screen containing the corresponding information of the selected Campaign
* Builder function for editing the created workflow design

* Explanation:
● The Workflow tab screen will display the previously designed Workflow
● The Action screen will show the history of how many times the action in the Workflow was run
● Statistics screen
○ The Email Stats chart will show the number of leads sent to the corresponding email, the number of leads who read the email and the number of leads who clicked on the link in the corresponding email.
○ The Point Action over time chart will show the number of leads applying Point Action in the campaign being run
○ The SMS over time chart will show the number of leads sent by SMS in the campaign being run
● The Leads screen will display a list of the leads belonging to the corresponding Campaign
● The Customers screen will display a list of Customers belonging to the corresponding Campaign